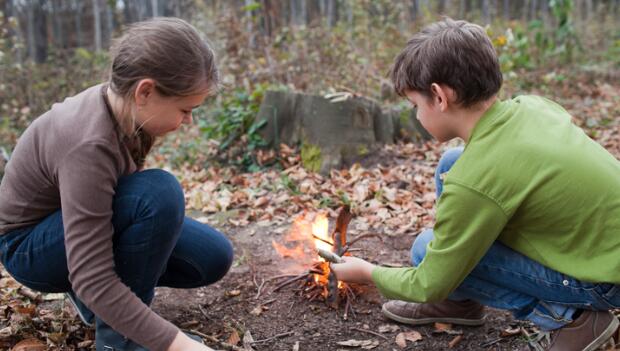
When you hear the word "camping," a swirl of pleasant images immediately comes to mind. But perhaps the most iconic is the welcoming campfire.
More than just to ward off the chilly night, a campfire is a place where family and friends gather to lounge and chat, roast marshmallows, or simply stare into the glowing coals and let the mind wander.
But before you can reach such nirvana, you should know how to start a campfire. And really, it's not that hard...
STEP 1: Gather Your Tools
There's a bit more to building a great campfire than simply placing a few logs in a heap and tossing on a match.
Here's what you'll need:
Tinder--the smallest and easiest burning materials used to get a campfire started. Tinder can take many forms, including:
- Wood shavings
- Wadded paper
- Strips of cardboard
- Commercial fire sticks or fire starters
- Dryer lint
- Wax
Kindling--the next step up in size. Usually twigs or small branches between 1/8 inch and 1/2 inch in diameter.
Firewood--the crown of an inviting campfire. Firewood can vary anywhere from 1 inch to 5 inches in diameter. It can be whole logs, or split down from larger pieces. It's important that your firewood is completely dry in order to start easily and stay lit.
Important Note: Don't break branches off trees for firewood. If everyone did this there wouldn't be any forests left. Some forest management agencies permit you to pick up fallen limbs but ask first.
Matches or a lighter--how else are you going to get your campfire started? Common stick matches are fine, although gas lighters used for starting BBQ grills are gaining in popularity.
STEP 2: Build the Fire
Before you can start a campfire, you have to build it first.
If your site has a fire ring, you'll probably have to push the ash and charcoal from previous fires to the outer edge of the ring to give you enough room for the new fire. For ashes that are stone cold, consider shoveling them into a plastic trash bag for proper disposal later.
If you have to create your own fire pit, clear away any dead grass or vegetation for 8 to 10 feet around. You want bare dirt. Then dig down into the cleared soil several inches and set the loose dirt off to one side for use in case of emergency. You can mound the dirt around the sides of the pit to act as a firewall, or place large rocks around the edge of the pit to insulate the fire.
Next, at the center of the fire ring, lay a bed of tinder perhaps a foot in diameter. (Remember, tinder is the really light, quick burning material.)
- The Teepee Fire: This style is good for cooking. First, arrange your kindling in teepee fashion over your tinder. Then build a larger teepee of firewood over the kindling. When lit, the flames will rise up through the kindling and into the larger wood.
- The Lean-to Fire: This style is also good for cooking. Start by sticking a long piece of kindling into the ground above your tinder at about a 30-degree angle, with the other end of the stick pointing into the wind. Then lean smaller pieces of kindling against both sides of the longer piece to build a tent. As the kindling catches fire add more, followed by your firewood.
- The Cross Fire: This is ideal for a long-lasting fire. Start by laying your kindling over the tinder bed in a crisscross fashion, followed by your logs or firewood.
- The Log Cabin Fire: Another long-lasting fire. Begin by creating a kindling teepee over your tinder, then lay two logs on either side of the cone. Place two more logs on top of these to form a square. Then build up using smaller and shorter pieces of firewood until you've formed a cabin. Top off the cabin with some of your lightest kindling.
- 1
- of
- 2


Discuss This Article