Road cycling can be exciting yet also intimidating. Here are some more tips to help you get comfortable, stay safe and have more fun in the saddle. Some of these tips you can try solo and even inside on a trainer while others should be practiced when you ride in a group.
Getting Clipped In
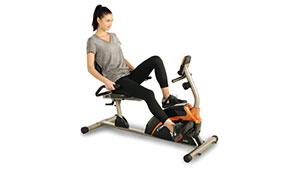
Switching to a cycling shoe and clipless pedals will make your cycling so much more effective, but there is some technique involved. Only clip out on one side at a time—we suggest using your right foot to stabilize when not moving. Instead of using your toe to clip out, pivot your heel away from your bike to release your shoe from the pedal. Before you hit the road, practice clipping in and out on a bike trainer. Once you're comfortable with the motion, move outside and try it on the grass, which will provide a softer landing for the inevitable unintended fall when you're still getting the hang of things.
Shifting
Choose your gearing in front before you find a gear in the back. If you're cycling on flats and downhills, you'll want to be in a larger gear in front; when climbing you'll want to be in the smaller ring. When shifting the gears in the back, you'll want to find a gear that will let you spin 80 rpm when on level roads—so it feels comfortable, fluid and light—and around 65 to 70 rpm when climbing.
As you approach the beginning of a climb, prepare by shifting from your large ring in front to the smaller ring, and then adjust the gears in the rear as you begin to climb. You don't want to shift to an easy a gear too soon and lose momentum, nor do you want to be in too hard of a gear at the beginning of a climb and make things too tough, too soon.
Pro Tip: You can practice shifting on a bike trainer to get the hang of the feeling of changing gears before you hit the open road.
Braking Basics
If you've figured out how to balance on your bike while pedaling, you've already learned how to gain speed. But you'll need to moderate this speed—sometimes quickly. Always keep in mind that your front brake has a lot more stopping power than your rear one, but if used too heavily, it could stop you with so much force that you'll risk going over the handlebars. Make sure to squeeze the rear brake confidently—without grabbing it—with increasing pressure. One technique for modulating your braking is to use only your first two fingers rather than your whole hand.
More Braking Basics
Another basic braking tip is to "feather" the brakes by lightly squeezing and releasing the front brake lever. This technique will help you scrub speed and keep control of your bike. Braking very hard and suddenly can lock up your wheel and cause you to slide out and fall. Practice braking when you are in a safe place, so that when you need to brake while riding open roads, you'll feel comfortable doing so safely and effectively.
Turning the Corner
When turning at slow speeds, it is easy to just steer your way through the turn, but as you get more comfortable with greater speeds you'll need a slightly different approach. The most important tip is to always practice taking a turn so that the foot on the inside of the turn is at the top of the pedal stroke. This will help you keep your weight on the outside foot for stability.
As you get more comfortable with speed, learn to steer by leaning your body weight into the turn, using your core. You don't want to oversteer a turn and have your bike slip out from underneath you. Practice this on safe roads with little-to-no car traffic, building up more speed each pass through the turn.
The Lowdown on Descending
Descending on a bike is exhilarating but can also be scary, so start on moderate hills with no intersections or cross traffic. Get comfortable steering with speed—turning practice will help with this too—and feathering your brakes. Keep your weight toward the back edge of your saddle for optimum stability. With your hands in the handlebar drops, perch your index and middle fingers lightly across the front of your brake levers. This position offers the most control of your bike and allows you to moderate your speed. Practice this skill by mastering a smaller slope before advancing to a steeper hill.
On Top of Climbing
While climbing on the bike may be technically easier than descending, there are a few tips to remember when the road pitches up. Sit up and at the back edge of your saddle with your hands lightly gripping the handlebar tops. Look up the road where you want to be, not at your front wheel or the road right in front of you. Pay attention to your pacing at the start of a climb: It may feel great to attack at the start, but you don't want to burn out before the top. Go for a steady pace—challenging but not crushing it—and add effort as you progress upward. Stay seated for as long as possible to produce the most steady and efficient effort.
When you get to a steeper section, you may find that it is easier to get out of the saddle. This position gives you more power, but the trade-off is that you'll fatigue more quickly. You can practice standing and sitting while riding the flats—you don't have to be on a hill to practice this technique—and remember to keep pedaling as you change position.
Riding With Others
Riding in a group requires some skill and etiquette. First, learn how to be near others yet not too close. To start, your front wheel should be two to three feet from the rear wheel of the bike in front of you with one to two feet of side clearance. However, when attempting your first few group rides, you may want more wiggle room.
Also—and this may be the most challenging aspect of a group ride—you need to implicitly trust the people around you. So make sure you are doing the same for the person following you by being calm, steady and predictable. If you need to slow down, let people know by announcing "Slowing!"
Courtesy Tip: If you're riding solo, don't just hop on a stranger's wheel without asking. This not only is poor etiquette, it can also be dangerous, as you don't know their abilities or what kind of riding they are doing. It could result in a crash, so it's always best to ask if you can join them.
Group Ride Hand Signals
If you've gone on a ride with other cyclists, you may have seen people in the group using hand signals to communicate with cyclists about what is going on. It is important to learn these signals and words so you understand the message and can pass it on. It is also important to learn how to signal others while keeping your bike riding in a steady, straight line. it's OK to practice these when riding solo so you feel comfortable once in a group. Gestures communicate speed changes, road hazards like potholes and changes in direction.
READ THIS NEXT: 10 Beginner Cycling Questions Answered


Discuss This Article